All posts filed under: Tips & Tricks

Lipstick Week, Day 6 Reject: How to Make Your Lipstick Last Longer

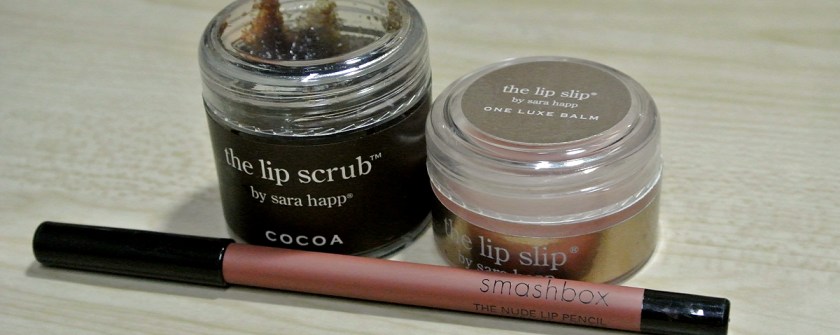
This was supposed to be a Day 6 post, I think, but then I wanted a space for my mauves and plums, so I was going to make it a “Lipstick Week Special,” but ended up being too swamped to put it up. Here are a few ways to make your lipstick last longer on your lips. 🙂 Obviously, it all still depends on your lipstick formulation. If it’s a glossy, sheer formula like the Revlon Lip Butters or the Chanel Rouge Coco Shines, then there isn’t really much you can do to prolong its wear. Still, it helps to prep your lips for a long day. 🙂 Make your Base Ace. What do I mean by this? Just prep your lips for a smooth ride. You can’t expect your lipstick to perform like a race car if the tracks are a craggy mess. Here are some tips for a great base: Exfoliate! This gets rid of dry flakes and creates a smooth base for your lipstick. You can buy a lip scrub (a good …

Make That Face Monday: Day to Night Eyes with the Urban Decay Naked 2 Palette

OK, so here’s a commitment I’d like to make: tutorial every few Mondays. The reasons for this are many-fold (get it? As opposed to just two-fold?), but let’s just say that I want a bit of a variety~ when it comes to makeup posts on here. Reviews are freaking awesome, but you know, what’s the point of hauling and swatching when no one can even see how you use the stuff? Will you learn anything new from these tutorials? Probably not. But you get to see me make a fool out of myself. For this week’s MTF Monday, I have a haphazard eye tutorial where you can upgrade a day look to a night look using the Urban Decay Naked 2 Palette. I think it’s useful and I take you step-by-step through it all. I hope it’s an OK video. Let me know if you have any suggestions for improvement. I promise I won’t take offense, just as long as you don’t be a douche about it. I’d love to do close-ups but my camera …

What’s in my Wild Peach Palette?

Sorry to possibly mislead you into thinking this was going to be exciting. I am in a sort of need to depot shadows right now, though, but a) I don’t have a spare palette, and b) I don’t really have all that much single eyeshadows to put into palettes. It’s just therapeutic, man. Must be the fumes. For the uninitiated, a Wild Peach Palette functions basically the same way as a Z-Palette. You can “depot” eyeshadows (that come in a metal pan), and stick them on there. This is good for customizing colors, or saving space when you have a ton of single eyeshadows. I don’t have a lot of singles, so I only got the personal palette, which are smaller and cost Php 285 or under $7. Anyway! Here’s what fit into it: Fanny Serrano singles: Beach Sand, Honey Glitter, Potter Clay, Mulberry Wine MAC singles: Amber Lights, Trax e.l.f. Brightening Eye Color: Ivy Wet n Wild Color Icon Trio: Walking on Eggshells I’ll quickly swatch them for you, so you have an idea …

TUTORIAL: Rose-Gold Eyes

Made another tutorial for this look! Used drugstore eyeshadow, so I’m sure it will be easier to recreate. If you like the video, please put a thumbs up. Let me know if you have any other requests for looks or videos because I quite like doing them, even if I look like I’m being forced at gunpoint to talk to y’all. 🙂 Products used: Snoe Beauty Let it B with WasaB (BB Cream) in Perfect Beige The Body Shop Brow and Liner Kit (02) L’Oreal Infallible Eyeshadow in Amber Rush Wet n Wild Color Icon Eyeshadow Palette in Comfort Zone K-Palette 24H Real Lasting Liquid Eyeliner Tarte Amazonian Clay Matte & Waterproof Bronzer in Park Avenue Princess Tarte Amazonian Clay 12-Hour Blush in Natural Beauty Obsessive Compulsive Cosmetics Lip Tar in Lydia Hope this helps! Enjoy and thanks for watching. 🙂

Depotting My Etude House Proof 10 Eye Primer

Or, who ever thought this genie bottle packaging is any good for anything, ever? The Etude House Proof 10 Eye Primer was my first eye primer. It’s been with me for about a year, and I love using it. If I can get the product out, anyway. It’s shaped like a vase, and the applicator is a doe-foot sponge (like a lipgloss’) and I just can’t be bothered to contort the wand through the opening and maybe scrape a thin layer of product. If I’m lucky. Often, I’m not so I use my Benefit Lemon Aid or NARS Pro-Prime Smudgeproof Eyeshadow Base (whew!). Anyway, I read this post by Neon Rock Rose eons ago and decided to do it myself. Once I found a glass pot to put the product in, I set right out to work. That and a really, really sharp blade is literally all you need. You just cut it across like so, but be very, very careful. Cutting stuff’s usually not a problem for me. I do a lot of that …

Make That Face: Gold-Aubergine Eye Look

Ladies & gentlemen, my first video tutorial. It’s super short and super easy, so if you want to find out how to make this look, then click right on ahead and watch the video. Here’s a step-by-step if you don’t want to see my mug! MAC Rubenesque all over lid up to crease. Benefit Stiletto on outer corner and outer crease. Blend with fluffy brush. Deepen crease with theBalm Nude ‘Tude’s Sexy. Highlight browbone with Fanny Seranno Beach Sand. Maybelline The Falsies Mascara on upper lashes. Smashbox blush on cheeks. MAC Jubilee on lips. Products used: – MAC Paint Pot (Rubenesque) — Review – Benefit Creaseless Cream Shadow/Liner (Stiletto) — Review – theBalm Nude ‘Tude Palette (Sexy) — Review – Fanny Serrano eyeshadow (Beach Sand) — Review – Maybelline The Falsies Mascara — Review – Smashbox Airbrush Whipped Cheek Color (Dusty Rose) – MAC Lipstick (Jubilee) If you have any questions, please don’t hesitate to ask! Constructive feedback is welcome and appreciated. 🙂